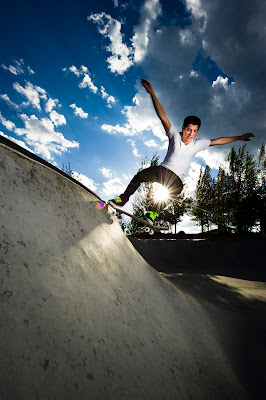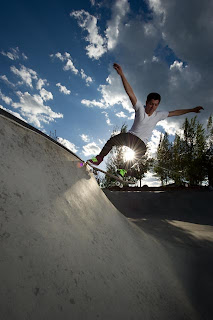
After RAW Conversion

Before RAW Conversion
Well first off, I adjust everything from top-to-bottom. This seems to be the most natural flow, and will create less chaos for each edit. I choose not to add too much fill light on most images because it looks better to render this with local adjustment brushes or using curves later.

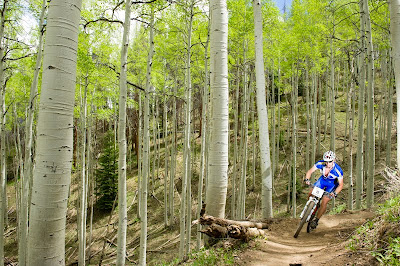
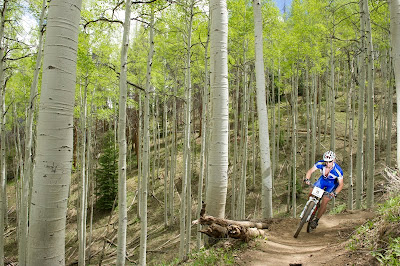
After RAW Adjustments Applied

Before Adjustments
Start off with your temperature adjustment. The easiest way to do this is use the picker tool, which looks like an eyedropper and is to the left of the WB sliders. Then click on a neutral gray or true white somewhere in the image. The WB should look pretty much perfect now. If not adjust manually via the sliders, move right for a more warm yellow look, and left for a blue colder look. Below this is the tint adjustment and if the image looks too green or pink, slide it the other way.
Next is your exposure adjustment, this way you have the image perfectly exposed to work with (assuming it wasn't perfect already, but I have high expectations from you.) Once this is narrowed down, slide the recovery tool to the right to bring back any burnt highlights if needed. Careful here, if you go too far right it will look pretty bad.
Fill light is next and this is a great one to recover some of the darker areas of the image, just don't overuse it or you'll get too unnatural of a look, and photoshop really does a better job of this. Slide the blacks to make them look true, or more if you want an extremely contrasty image.
Adjust brightness as desired (note that the brightness tool is WAY different than exposure, experiment with the two.)
Now it's time for contrast, in my opinion, the tone curve is a much better way to bring in or reduce contrast than the slider. So let's skip this one on more images. I generally leave this at it's default +25.
Clarity adds darkness to the edges so this slider can create a very cool look, slide it left and you get a bright halo kind of image.
Vibrance adds more saturation to the more saturated colors of the image, and saturation adds more color to every color in the image, use these carefully because it's easy to overdo it.
We've finally arrived at the Tone Curve. This is one of the most useful tools in Lightroom, and Photoshop. I prefer to use the sliders to get accurate control over each range. There are presets below the sliders that add more or less contrast as well. If you want more contrast, generally boost the lights, and decrease the darks. Less is the opposite. Then do your fine tuning in the highlight and shadow areas based on your personal desires.
That's pretty much it for the basic global adjustments. The sliders below Tone Curve for HSL, Color, and B&W are all for correcting specific colors in the image, experiment with this to fix a bad color or too change colors in the image. Most images will not need any of these.
Split toning helps you convert an image to different colors. This is not necessary for most images.
Almost all RAW images need some degree of sharpening, if I'm editing the image in Photoshop, I leave lightroom on it's defaults here and add my own export sharpening in Photoshop. If you do an export from lightroom you can choose to have it apply low, medium, or strong sharpening. Apply in lightroom if you need to add a lot, and in photoshop if you need local sharpening.
Under lens corrections in Lightroom 3, you will find distortion corrections, which are great if your verticals are tilted, pin-cushioned, or bulging. I only need to use these for architectural shots, and use Photoshop's Lens Correction features instead. Vignetting is also an option to fix and is very easy to adjust here. Sometimes I like to add a vignette for effect.
Now on to the local adjustments. These are the adjustments right below the histogram at the top of the bar. From left to right we have: Crop & Straighten, Clone/Heal, Red Eye Removal, Gradient/ND Filter, and Adjustment Brush.
Since the first one is obvious we will skip that. Next one is the clone/heal which I prefer to do in Photoshop. If there is a small spot or dust in the image, I will use this to remove it. Just click on the spot and it should automatically clone from a great area. If not, move the source point to a better position. Red eye removal is something I never really need since my flash is way above or away from the lens plane.
Here is where it starts getting really fun! The Gradient filter is an amazing and simple tool. Choose the setting you want to change first. I usually want a dark blue and saturated sky, so I will boost saturation a bit, and lower the exposure a little. Then simply click where you want the gradient to take effect, and drag it to reduce the harshness. That's it! You can make it wider for a more gradual effect, and narrower for a more harsh look. You can also click on the middle and move it or redirect it. Once it's in place and selected, you can also slide any sliders to change it's effect. If more than one gradient is desired, simply click new at the top. To edit the last one, just click on the dot in the image that represents it. This is the same way the adjustment brush works.
Select the adjustment brush icon, and you will see a menu similar to the gradient, but including a set of options for brushes. Here you choose the size of your brush, how harsh it is (feather) and smooth it flows. I leave feather and flow on the standard setting for most applications. The check box that say's "Auto Mask" will help keep your brush between the lines if selected. If that's not what your looking for, de-select that option.
That's pretty much it for Lightroom. Just right click on any image and choose "Edit in" and then "Photoshop" to bring it into photoshop. When you choose save there, it will automatically place your edited copy next to the adjusted RAW file in Lightroom. Any adjustments you are not happy with can be removed in the "History" panel on the left. Have fun, and remember that experimentation is key to mastering RAW adjustment in Lightroom!
That's the BUZZ for Today! Please check back soon for more.


0 comments:
Post a Comment