Showing posts with label cnw photography. Show all posts

Friday, October 8, 2010

Nik Software HDR Efex Pro now available!

Just downloaded the free 15 day trial and ran two super-quick HDR's.  The program is UNREAL!!  Soo fast and simple, yet full of every adjustment you could ever need.  I was using photomatix pro before which I enjoyed, but this program put's it to shame!  I'll have to test it a bit more before I give the full review here on APB.  For now, head over to Nik Softwares Site and test it out for yourself.

The program has far more adjustments than I've ever seen, and they all work at hyper-speed.  This IS the next-generation of HDR imaging tools!

Here's the two sample HDR's that I created in a just a few minutes.  Let me know what you think of the program in the comments below based on your experiences with the trial.  Definitely going to have to buy this one!

092410-0012_HDR.jpg

Wednesday, September 29, 2010

Composition 101

This is a basic post for photographers just getting into photography, but it is also a great refresher for those of us who shoot professionally.  Composition is one of the most important lessons to learn in photography. It takes practice and skill to get it correct, and is easily learned using a point-and-shoot when your beginning.  If you try and learn this at the same time as full manual control it might become overlooked.

Great pictures don't always mean full manual settings like many pros believe.  The composition of a photo is key to creating amazing images.  Let's start off with the "Rule of Thirds" which is simple to understand once you see what I mean.  Below is a diagram showcasing the rule of thirds.  The "Rule of Thirds" is simply a way to compose your image by dividing it into sections.  The frame is visually divided into 3 even rows, and 3 even columns.


So how do you apply this to your images?  Try and move the elements into the individual thirds.  For landscapes, place your foreground feature in the bottom third, background in the middle, and sky in the top.  It's more appealing this way then placing the horizon in the middle (most of the time...).  This rule can apply to any type of work that you shoot.  Most action images typically look best when the athlete is one-third of the way into the image.  Here is an an action image I captured that really demonstrates this composition:


100303-06372-Edit-Edit

Friday, August 13, 2010

Shooting the Skate Park with style.

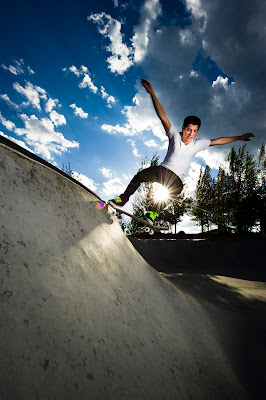
Here are some great tips if you are just starting out, or working towards shooting skating professionally.  Here's the first truth:  You don't have to shoot pros.  They are not willing to sign releases usually and are tougher to get a hold of.  The amateur guys are often just as good, and are far more fun to work with since they don't shoot all the time!  They are more excited about getting great images and often more willing to work with you.

So how did I find these athletes to shoot with?  It does help that I'm at the skate park quite a bit skating for fun....  However, often times I'm shooting people that just happen to be at the park and are good.  And no, shooting them from a distance and hoping to get a good shot is not the best approach.  Walk up to the athletes and ask them if they want to take a few shots.  They are usually very interested!  Also, get them to sign model releases if they are willing after the shoot.  This way you have them in case you sell the images for stock purposes.

With skateboarding photography you can't really be timid.  If your staying back too far you may not get the best shots.  A lot of published images are taken in close with wide angles lenses.  This is because it makes the trick look a little bigger and showcases how extreme the sport really is.

So here are my 2 favorite shots from an hour of shooting with Will, the descriptions contain my setups and why I set them up the way that I did.

081110-0037.jpg

Tuesday, July 20, 2010

RAW Conversion with Adobe Lightroom

After RAW Conversion


Before RAW Conversion


Converting images can be a bit confusing at first.  Think of it as your preliminary edit where you are doing the strongest adjustments, then use Photoshop for the more technical and finer details.  It's a global edit (some local if needed) of your image.  The best part is that none of the adjustments are actually affecting the RAW file, so you can do whatever you want with no image degradation or damage!  So how do you know where to start?

Well first off, I adjust everything from top-to-bottom.  This seems to be the most natural flow, and will create less chaos for each edit.  I choose not to add too much fill light on most images because it looks better to render this with local adjustment brushes or using curves later.

Thursday, June 17, 2010

The 100th article: Top 10 Posts in APB history!

It was tough coming up with something spectacular for the 100th article.  But considering how many articles full of useful information are on APB, I decided it would be fitting to list the top 10 articles of all time.

Enjoy!

#1:  Get Published in Magazines

#2:  The Ins-and-Outs of Event Photography

#3:  Photoshop Basics: Sharpening 101

#4:  Do's and Dont's of Skiing Photography

#5:  Pricing, Your Professional Life Depends On It

#6:  Mountain Bike Action: Top Tips

#7:  Balancing Fill Flash with Ambient Light

#8:  Creating Soft and Even Lighting

#9:  Extreme Sports Photography

#10: Creating Your Website Portfolio


These, in my opinion, are all must-reads.  But be sure to check out the Index page and see what else is offered at APB.  Learn all kinds of tips, and see some of what I do in the "Shoot Journal" section.  From dealing with clients, to learning photography and editing, APB has something for everyone.

Thank You for visiting All Photo Buzz and helping me make it what it is Today.  From here the sky is the limit and I couldn't keep this up without the support of my loyal readers!  Feel free to comment below with links to articles that have helped you in any way.


That's the BUZZ for Today! Please check back soon for more.

Tuesday, June 15, 2010

The Top 20 Things I wish I knew from day one!

When I started this blog, I had one idea in mind:  Share all the knowledge (for free) that I have acquired over the years as a professional photographer, with other upcoming photographers.  All of the stuff that I wish I knew, but may have learned the hard way.  Now, All Photo Buzz (APB) has expanded into many more ideas and continues to grow by the day, both in popularity, and content.  This is the 99th article to be posted!  Check back on Thursday for the 100th!!!


Now, here in a list in no particular order (and probably missing a million things that you will need to know) is my take on the top 20 things most photographers should be taught from day one, but usually learn the hard way.


The above photo was supposed to be one of my 3 entries for Teva games, but rule #1 was forgotten on my part and therefore all but this low-res sample was lost with my fried hard drive.

Monday, May 10, 2010

Shooting for the LOVE of shooting


I'm often talking about making money and shooting cost effectively.  While, today I want to tell you something different, and to offer some inspiration.  When people ask me where I learned photography, my answer is "in the bathroom."  I'm self taught, and a lot of my knowledge comes from photography magazines (which I happen to like reading when I go to the bathroom).  This may sound weird, but chances are that your weird too and just don't know it.


The most valuable lessons I've learned, could not have been taught to me by any person or reading material.  It came from EXPERIENCE.  Shoot every chance you get and never don't shoot because you feel the images won't be "salable".  Even if you don't sell any images, it's never a waste of time.  You learn new skills when shooting, and have great experiences.  And sometimes, you will be surprised to find that you created some of the best images of your life on a day that you had no plans to shoot.