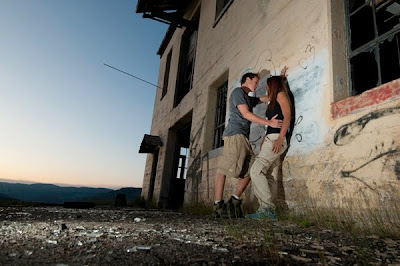
before
after
One of my all time favorite adjustments that I will perform on just about every single image is shadow/highlights. This is a very simple tool that if used correctly, will yield incredible results. The most important detail about this tool is that it CAN be overdone. If you over do highlight recovery, you will lose your true whites, and if you overuse shadows, you will have a halo around the darker spots of your images.
Depending on the image, I almost always adjust shadows to about 12-14% and generally don't adjust the highlights (unless it's a snow image or very overexposed). Some images you can get away with an overall adjustment of the image without masking the shadow/highlights adjustment. For those of you who don't know what masking is, it is the ability to selectively apply the adjustment to just the parts of the image that need it. This way you don't introduce noise, or other problems to the image.
Here are the steps to create a masked shadow/highlights layer:
1. Duplicate the background image, press (CTL+J on PC, CMD+J on Mac) Now you have two copies of the image on top of each other, and if you do something wrong you can just delete the copied layer that you are now working on.
2. Perform your Shadow adjustment. Go to Image:Adjustments:Shadows/Highlights. Typically put this fairly high because we can change the opacity later. I will usually set it at about 14%. Don't go too crazy though.
3. Create your mask (this will hide the adjustments you made) by pressing Alt/option and clicking "add a new mask" button in the layer's panel.
4. Choose any paint brush or lasso tool and paint/lasso the areas that you would like to reveal your adjustments. I typically use a softer brush so the job is not obvious, and set the opacity to about 40% so that I can control how much detail is restored.
5. When your all done and completely POSITIVE that the adjustments are how you want them, you can flatten the image and continue with all of your other adjustments. To flatten the image, right click in the layer's panel and choose "flatten image".
That's it. It seems like a bit to learn at first, but once you have the hang of it you will be performing this operation without even thinking! Check back tomorrow to learn the best scenario dependent settings for your camera.


0 comments:
Post a Comment